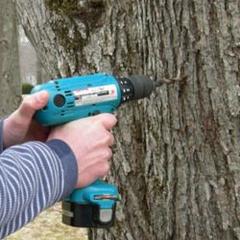
Tap Tree
Tap Maple Trees at Home – Tapping Trees
When To Tap Maple Trees
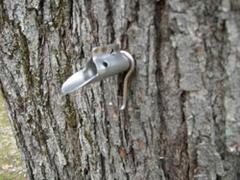
 Generally the sap starts to flow between mid-February and mid-March. The exact time of year depends upon where you live and weather conditions. Sap flows when daytime temperatures rise above freezing (32 degrees Fahrenheit / 0 Celsius) and nighttime temperatures fall below freezing. The rising temperature creates pressure in the tree generating the sap flow. This is basically a transfer of the sap from the tree above the ground and the root system below the ground. The sap generally flows for 4 to 6 weeks, with the best sap produced early on in the sap-flowing season.
 Select Maple Trees to Tap
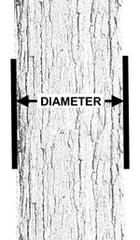
Now is the time to pull out that yard map where you have identified your maple trees, including the type of maple tree. The recommended order in selecting your maple trees to yield a higher sugar content is: Sugar, Black, Red, Silver. Select trees that are mature (at least 12 inches in diameter) and healthy. That tree on the edge of your driveway healing from a direct car hit is not an ideal candidate for tapping. Additionally, select trees with the greatest exposure to sunlight. If you have a limited number of maples available, you can tap a particular tree two or tree times, depending upon its size. Using these guidelines, a healthy tree will support multiple taps: